Thursday, July 31, 2008

-Build A Flower Embellishment Freebie


I created a new commercial use product, and will be putting it in the store here in a little while. It's a mini Build A Flower, kit. It includes 2 different kinds of flowers and different centers for your flowers. Flowers are greyscaled for your own colorization preferences, and kit is PSP 7 & 9, and PS friendly.

I wanted to share a completed flower with you :)
The flower embellishment is about 800 x 800 pixels, and in PNG format.
This freebie may be used commercially.

You can download from the link below...
:: Download Freebie Here ::
Huggles, the Sunshiny Scrapper

Wednesday, July 30, 2008

-30% Off On All My Items At The Shoppe!


I'm having a sale!
Yep, 30% off all my products :)
The majority of my items are CU, products.
Check out my products at "Scrappy Thoughts Design Shoppe".

:: Scrappy Thoughts Design Shoppe ::

I hope you find something you like.
Huggles, the Sunshiny Scrapper

PS..This will also give you a chance to browse our new shoppe, and look at other products on the shoppe.

*Special Note* Background paper used in my Sale Graphic, courtesy of POC Designs, a fabulous designer at Scrappy Thoughts Design Shoppe :) The name of this kit is called "Cherrie Shizzl".

-Can You Help With An Important Cause?

I have been a member at a wonderful giving site called "Microgiving", for 5 months, now. I have personally experienced such charity, kindness, giving, and love there. They helped me go to Ohio to watch my only daughter graduate from High School last month. They do so many wonderful things there to help those in need. I'm reaching out to ask for your help in their charity and giving.

This is the newest need they have been trying hard to meet for so many victims:

From: Micro Giving
Subject:MicroGiving’s Latest Impact
Date:2008-07-24 15:53:00

In response to the recent disasters in the Midwest, MicroGiving sent a team to Cedar Rapids, Iowa to help resurrect the city. Lead by our very own Michelle Fraedrick, MicroGiving was able to organize an event to not only help with the clean-up physically but also provide financial assistance. You’ve probably noticed the new profiles popping up all over the site of incredible people in incredible need. The awareness spread by MicroGiving has raised thousands to help give these families and local business’s the spark they need to get back on their feet. Although we are no longer in Cedar Rapids the assistance will continue; we are in constant contact with the people of Cedar Rapids and consider this a long-term venture. This was the first effort for this branch of MicroGiving, the first of many, and we are proud of the impact. Between the staff’s devotion and our amazing members we have been able to make a real difference in many lives. We have to make sure to keep the awareness alive, as most aren’t even aware of the severity of this disaster. We will keep you updated on our efforts and are excited about the recent and future impact of MicroGiving and its members.

Thank you,

The MicroGiving Team

As you can see, this is a huge effort, and truly something to be proud of taking part in. I ask all graphic artists, please share a charity kit to help with fund-raising for this organization, they are a blessing in disguise to so many people.

Thank you for taking the time to read this post.
This means a lot to me, and to many other's.

You can visit Microgiving by clicking on the link below.

:: Microgiving, putting a smile in your heart ::

Thank You
Love and Hugs,
the Sunshiny Scrapper

PS. If you can host a charity kit on your store and the proceeds go to this charity, please send me and email to: sunshinyscrapper@gmail.com

Monday, July 28, 2008

-I Heart U Charm Freebie


Just something I was playing with today.
Not sure if I like it, LOL.
Feel free to download and use if you like it.
Charm is in PNG format only.
If you would like to download, just click on the link below.
:: Download Here ::
Huggles, the Sunshiny Scrapper

Saturday, July 26, 2008

-Working on my Blog :)

I'm working on my blog so it will be more visitor friendly.
Please bare with me while I update.
I added categories so that browsing is easier :)
Huggles, the Sunshiny Scrapper

PS. I added a poll, would you please vote?
TY :)

- Join Us At Scrappy Thoughts Forum!


I'm running a wonderful challenge there each month.
It's called "Make It Match Challenge".
The challenge is to create a matching paper and element based
on the theme I decide each month.
Come join us there if you just want to have fun, learn, or just play!

Those who participate, will get a freebie from me each month, it will
normally be a CU Freebie, and will be given out at the end of each month :)
And you never know what it will be.

There are currently many other challenges going on there too, such as:
--Template Town Challenge
--Lift Me Up Challenge
--Fontastic Challenge
--Color My Life Challenge
--Quotations Challenge
--Fabulous Me Challenge
--Click, Take A Pic Challenge
--Journaling Challenge
--Desktop Challenge

So, join us there.
:: Scrappy Thoughts Forum ::
Huggles, the Sunshiny Scrapper

Friday, July 25, 2008

-CU Just Journal It Freebie


I made some journaling/bracket templates today.
I will be putting the whole set of [10] on the store.
Each template is about 800 x 800 pixels, 300 dpi.
They are on layers unmerged, so that you can add your own
custom colors/textures and designs to them.
Each template comes in both PSD and PSP 7 & 9 Formats.
Remember each layer can be moved too :)
This one is free, and may be used commercially.
I hope you can use it :)

:: Download Here ::
Huggles, the Sunshiny Scrapper

*Note*, I noticed today when I tried to resize the normal way, it made them look all jaggy and distorted, but if you use the deformation tool in PSP, to resize, it works a lot better. Thought I would just share this :)

Wednesday, July 23, 2008

-Staple It Up Freebie


My newest freebie for ya.
This is a freebie for taggers.
This is the first time I tried to make staple like embellishments.
PSP 7 & 9 Formats only.
I hope you can use them.
May be used commercially.

You can download from the link below.
:: Download Here ::
Huggles, the Sunshiny Scrapper

Monday, July 21, 2008

-Stripe Simplicity Paper Overlay


I just finished a new set of paper overlays.
Overlay is: 12 x 12, PNG Format, and 300 dpi.
I will putting the whole set on the store in the morning.
I am giving you one for free :)
I hope you can use it.
My overlays are a commercial use product.

You can download the overlay from the link below.
:: Download Here ::
Huggles, the Sunshiny Scrapper

Friday, July 18, 2008

-Dog Bone Embellishment Freebie


This is a set of 8 doggy bones.
Includes one blank one to add your own text.
Text used on embellishments is Bank Gothic.
Each embellishment is 200 dpi, and in PNG format.
I hope you can use them.

You can download the zipped embellishments from the link below.
You must have a zip program to unzip.

:: Download Here ::

Hugs, the Sunshiny Scrapper

Wednesday, July 16, 2008

-Looking for a Product Quality Checker.

I'm in search of a product quality checker.
Get all my overlays and any other item I may put on our design shop for free.
All you do is check the quality of my work, and let me know what you think?
If interested, please send me and email.
TY :)
Huggles, the Sunshiny Scrapper

:: Email Me ::

-Awards

Photobucket

The rules of the award are:
1. The winner can put the logo on her blog.
2. Link the person you received your award from.
3. Nominate at least 7 other blogs.
4. Put links of those blogs on yours.
5. Leave a message on the blogs of the girls you’ve nominated.

I would love to nominate, without further ado :)....

:: Sophisticated Scraps ::
:: Misfits Scraps ::
:: Meetje's Digi Scraps ::
:: Scrappy Thoughts Designs ::
:: My Other Scrap ::
:: Off the Scrappy Path ::
:: Black Faery Designs ::

Sunday, July 13, 2008

-New Retro Craze Paper Overlay Freebie


I just got through creating a new set of Retro Craze Paper Overlays to go on the store in the morning. I'm offering one for free, if you would like to have the whole set of 12 overlays, please visit the store to purchase. Each overlay is 12 x 12, 300 dpi, and in PNG format. You can use this product commercially.

If you would like to download, visit the link below.

:: Download Here ::

If you would like to purchase the set of 12 retro overlays, visit our new "Scrappy Thoughts Design Shoppe", by visiting the link below.

:: Scrappy Thoughts Design Shoppe ::

Huggles, the Sunshiny Scrapper

Saturday, July 12, 2008

-2 Paper Overlays Freebies


Here are two "We're Square" Paper Overlay Freebies. You can download each one seperately. Feel free to use these commercially if you like them.
Huggles, the Sunshiny Scrapper

:: Download Here ::

Link is now fixed, thank you for telling me :)
Huggles

Friday, July 11, 2008

-Scrap Kit Ideas?

Do you have some scrap kit themes you'd like to see added for
free and to our store?
If so, please leave your ideas by commenting to this post.
TY, the Sunshiny Scrapper

Thursday, July 10, 2008

-CT Call

CT Call coming soon!
Watch this post to find out more :)

Wednesday, July 9, 2008

-Sizes for Digital Scrapbooking Items

When I first started trying to create digital scrapbook items,
I was so confused about sizes. This is what I learned with all my questions.
I thought this might be helpful to you newbies.

Size for Papers: Papers should always be created 12 by 12, for digi scrap purposes, and should be 300 dpi for better printing quality. However, if you are making papers for taggers, you can vary the size and make them smaller, also they only have to be created at 72 dpi. Papers should be saved in jpg format.

Sizes for embellishments: Embellishments should typically be at least 1/2 inch, 300 ppi, and 300 dpi. Breaking this down in pixels it would be approximately 150 by 150 pixels. If you wanted a 2 inch embellishment, it would be 600 by 600 pixels, and 300 dpi. Keep in mind, that your embellishment size should match the size of your papers, so they look realistic enough to match in size. [In other words, if you are making a paper clip, you want it to look approximately the size it would look if you were actually making a scrapbook page]. Again, if you are making embellishments for taggers, you can make them bigger or smaller, and they only need to be saved in 72 dpi. Embellishments should always be saved in png format, this allows your embellishment to remain on a transparent background when needed.

Sizes for Overlays: Overlays for papers should be 12 by 12, 300 dpi, black/whites/grays, and saved in png format.

Ribbon Sizes: Ribbons should be 17 inches high by as wide as you want your ribbon to be. Some of the typical sizes of ribbons include, but are not limited to: 1/4-inch (.25), 3/8-inch (.375), 1/2-inch (.5) and 5/8-inch (.625).

Sizes for Scrapbooking Page Templates: Sizes are typically created in: 12×12, 10×8 and 8.5×11. Templates are typically saved as png, 300 dpi, and are usually layered.

I’ll share more tips as I find them.

Huggles, the Sunshiny Scrapper

-Creating Grunge Paper Overlays [my way]

This tutorial written in Photoshop CS2 ,
but can be done in PSP, as well.
Tutorial written for advanced users,
as there are no screen shots available.
After learning how to create paper pattern overlays,
I decided I was going to learn how to create
texured/grunged/scratched overlays.
I wasn’t giving up until I figured out an easy way to do this.
I tried to follow different tutorials with brushes etc,
but they just didn’t work for me.
It didn’t matter how much I played with it, I just didn’t like the outcome.
So, here we are, creating grunge the easy way.

The first thing you need to do, is find some free large textured images.
The bigger the better, because it’s easier to size down in my opinion,
than it is to size up.

Let’s Begin!

Begin by finding a nice textured image on the net.
[A free one or pay one, that is safe to use].
You can use an image that has a lot of texture,
scratches, grunge [the sky’s the limit] here.
Once you find one you want, open it up in Photoshop.
Duplicate it, and close out the original.
We are going to resize it.
If your image is too big or too small, we’ll fix this.
The image I’m using is larger, so I will be sizing down.
Go to image in your main tool bar, click on Image Size,
a box will pop up with all the image information.
In the area where it says: Document Size,
we will be changing some settings in there.
Change the width and height to 12 inches, 300 dpi.
Look down below that and make sure these settings are the same:
constrain proportions unchecked, resample image checked,
bicubic,and click okay. Now your image has been resized.
It may not look like much, but we have a few more things to do.

Next we need to greyscale our image. It needs to be in black and white.
Go to Image, adjustments, desaturate. PSP users, you can do this step
by simply going to Image and choosing greyscale.
Your image should now be black and white.
If you greyscaled your overlay in PSP, make sure you go to
Image, increase color depth, choose 16 million colors.
You have to do this, because once saved, if you don't, the
greyscale overlay will not work properly.
Next we are going to define our image to make the effect of our overlay better.
Go to Image, adjustments, but this time choose curves.
Play with the curves until you get a look you like, dark or light, and very defined.
PSP users, for this step you can create the same technique by going to Adjust, brightness/contrast, choose curves.
You’re almost done!

Next create a new layer on top of your grunge image.
Flood fill this layer with a color of your choice.
Take your fill value down about 50 percent,
this depends on the lightness or darkness of the paper you are trying to achieve.
Play with your settings on that layer.
Change to hard light, overlay etc. just whichever effect
you think looks best.
Delete your colored layer, and save as a png.

And guess what?
You’ve created yourself your very own grunge overlay,
but we aren’t done yet.
Make a folder in your documents where you wish
to save your own overlays.
And yes, it’s now time to save!

Another great tip for this tutorial is to open
two different grunge images, and
do the same steps for both images,
drag one image onto the other.
Play with your fill values and overlay settings
to achieve tons of different looks!
Merge the two or more layers together, and save your new overlay.
Also, don’t forget you can add your patterns,
to make a patterned grungy paper!
Isn’t that cool, all the things you can do
when you’re in the mood to create?!
I hope you’ve found this tutorial easy,
and more importantly, fun and helpful.
If you use my tutorial,
I would love to see what you create.
If you have any questions or comments,
post me here or in my shoutbox.

Huggles, the Sunshiny Scrapper

©the Sunshiny Scrapper, 2007.

-Creating Patterned Paper Overlays [my way]

I tried and tried to make pattern overlays.
I thought, “how in the world do they do that?”
I knew how to create a simple pattern, but how do I get that pattern
to be seamless and fill a 12 by 12 paper correctly?
I played and played until I did it my way.
This was the easiest way I have found to do it.
I hope you find this tutorial easy, too.
This tutorial written in Photoshop CS2,
but can be done in PSP, as well.
This tutorial is for the advanced user,
as I have not included screen shots.

Let’s Begin!
The first thing we’ll be doing is making our own pattern to use.
Open a new 200 by 200 pixel, white, 300 dpi image in Photoshop or Paint Shop Pro,
doesn’t matter which one you use, although I prefer Photoshop.
Next choose a brush or shape you would like to make your pattern with.
Make sure your background and foreground colors are set to black or a gray color.
This is so your pattern can be colored, later on.
Also, keep in mind you can reverse,
and instead use a black background with white or gray images, as well.
Create a new raster layer.
Draw your shape or brush as big as you wish it to appear overall.
I think smaller images make better patterns myself.
So sizing is strictly up to the effect you “wish” to create.
Once you get your image drawn, duplicate it.
Move your duplicated shape/brush straight across from it,
or you can stagger it a little, this is up to you, as well.
Images below show what I mean, in either case.


Once you have your duplicated shape/brush
where you want it to be, merge your image visible.
Next, crop out any access background.
Go to edit, Define pattern, give it a name, and yes, save it.
You’ve just created your pattern.

Now on to the fun part, that is,
checking out what it looks like on a 12 by 12 paper.
Open up a 12 by 12, 300 dpi, transparent image.
Go to edit, and choose fill from the list.
Choose your patterns menu.
Scroll down the list of patterns,the pattern you just created
will be the last one in your pattern menu.
Choose your pattern, and click okay.
Click on your zoom tool, and click on actual pixels.
This will show you how your pattern overlay, looks on a 12 by 12 paper.
If it doesn’t look great or doesn’t tile correctly, all is not lost,
just mess with your shape/brush image,
and move it around and save as a new pattern.
Once you get it to look how you want, you’ll need to save it.
I’ve created a folder in My Documents for the pattern overlays I’ve created.
Save it where you want, and make sure you save it as a png file.

There are so many patterns and styles you can create.
Remember, you aren’t just limited to using shapes and brushes,
you can use other images, as well.
The main thing is to get them to tile correctly.
Also, if you are making patterns to sell,
remember to use copyright free images,
and things you’ve created yourself as not to violate any TOU’s.
I hope you enjoyed this tutorial.
If you try it, and found it helpful
would love to hear from you.
Just leave me a comment here in the post, or in my shoutbox.

Huggles, the Sunshiny Scrapper

© the Sunshiny Scrapper, 2007.

-My First Freebie 4 You!

My first freebie for you!

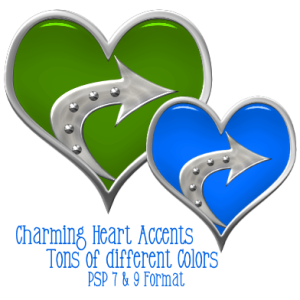
This is a set of tons of different colored charm accents. Charms are in one file on different layers. Each charm is PSP 7 & 9 Format Only. These are for PSP taggers. Charms are for personal use only. I hope you enjoy these charms :)

You can download the set from the link below…

:: Download Here ::

Huggles, the Sunshiny Scrapper

Monday, July 7, 2008

-Welcome to the Sunshiny Scrapper

I would like to welcome you to the Sunshiny Scrapper.

I have a pocket full of sunshine, and want to share it with you!

I am fairly new to blogging, so bare with me, while I add to this blog.
I’ve been designing for over 6 years now,
and hope to bring you a wonderful design world filled with color.
My motto is to design with you in mind.
Simply put, my designs are inspired by you.

You’ll learn new things about me, as well as, to grab freebies I post on this blog.
I only ask a couple of favors. Grab what you want, and offer a thank you. Please do not post my graphics on your site, claim as your own, or share in any kind of group. Again, these are freebies posted for you to use and are my own creations. I don’t require you to link to my site, but would appreciate it. Or just send some of your friends my way.

Most of my items are made in PSP for general tag making, however, I am learning how to create items for digital scrappers, as well. So, at times, I will offer items for digital scrapbooking too.

Please join us here for weekly freebies, and I ask:

Let us color your world!

If you have any questions or comments please send email to: sunshinyscrapper@gmail.com


Huggles, the Sunshiny Scrapper

PS. I'm excited to be a new designer at Scrappy Thoughts!